
DIY Fall Wreath with an Upcycled Silver Platter
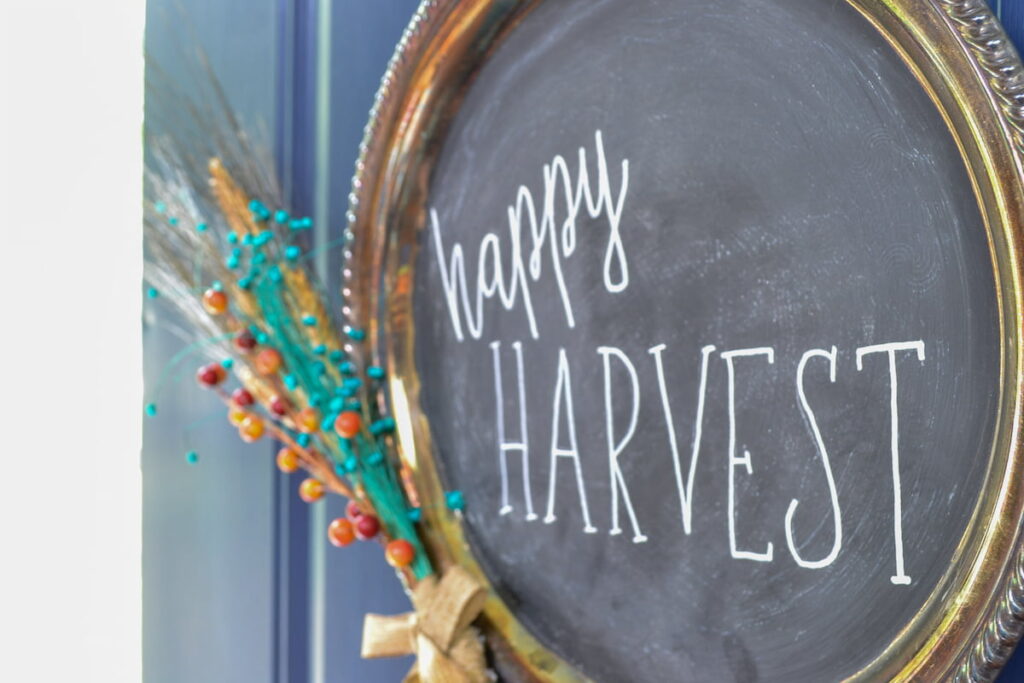
You can use an upcycled silver tray to make an easy DIY fall wreath with chalkboard paint. Then, write a fall chalkboard saying using the printable graphic, add some fall floral stems, and hang in on your front door to welcome fall!
In my first years of home ownership, I never decorated my front door for any holidays. I always found wreaths to be expensive and somewhat generic looking. And, in some cases, I think wreaths can be downright ugly!
Of course, everyone has their own taste and budget, but personally, I’d rather make a DIY wreath or door decoration that fits my style and doesn’t cost a lot of money. Since then, I’ve really enjoyed inventing new ways to create “wreaths” from second hand finds and craft supplies.
This post was originally published in 2016 and has been updated with new images, links and a step by step tutorial.

Maybe you find this wreath to be “downright ugly”, but it cost me only a couple of bucks to put together, and was really easy to make. Plus, you can customize the fall chalkboard text to say whatever you’d like!
Supplies to make a DIY Fall Wreath
This post contains affiliate links. Feel free to read my full disclosure policy here.
- old silver platter
- brush-on chalkboard paint
- chalk marker or chalk pencil
- E6000 glue
- d-ring hanging bracket
- fall floral stems
- ribbon
- “Happy Harvest” printable text
I picked up this sterling silver platter at a thrift store with the intention of making a chalkboard wreath – I just didn’t know for what season! You can find all kinds of shapes and sizes of silver trays at thrift stores.
Steps to Make a Chalkboard Wreath
- Chalkboard Paint: Use a brush to paint on two to three coats of chalkboard paint. Rustoleum chalkboard paint is my go-to chalkboard paint after testing out a few different brands. I have a full post on EVERYTHING you could want to know about using chalkboard paint in your home here.
- Write Fall Chalkboard Saying: I have a full post on how to write perfectly on a chalkboard which gives a step by step tutorial on how to transfer any image or text onto a chalkboard.
- Print “Happy Harvest” onto a sheet of paper
- Rub chalk onto the back of the paper
- Place the saying face up on the chalkboard
- Use a pencil to trace the image/text, using pressure as you trace
- Remove the paper to reveal a light chalk copy of the text
- Trace over that with chalk or chalk marker
3. Attach hanging bracket and floral stems: Use E6000 glue to glue a d-ring to the back of the platter for hanging. Then, use the same glue to attach fall flowers to the side of the silver platter. I used dried wheat grass stems and faux berries.
4. Hang it up: Use a ribbon to loop through the D-ring and tie a bow at the top. Then, hand your unique fall wreath on your front door!
Depending on the size of your craft supply stash, the only item you may need buy to make this wreath is the second-hand silver platter (or pick one up at the Dollar Store)! With the supplies I already had at home, this wreath cost me less than $5 to make.
Since we’re talking about inexpensive wreath ideas, here are the other strange ways I’ve decorated my front door for different holidays.
Remember how I said wreaths can be “downright ugly”? I sure heard from people on YouTube that my scarf wreath was the ugliest thing they’d ever seen. I heard that I should burn it and a few people would rather die than hang it on their front door. Of course, everyone isn’t a hater, and the other half of commenters thought it was neat. Can’t please them all!
Here are a few more easy Fall projects you may enjoy:
Post by Jenny Leads
Jenny is the voice behind Refresh Living. She has a passion for helping people to create a home they love without spending a lot of money.
I love this idea for a wreath! It turned out perfect, pinning!
In Love! what a unique project for the holidays! Maria
I think “abnormal” is brilliant! Looks great.
So cute Jenny! I love your unconventional wreaths!! Pinning!
This is a great idea for a unique wreath. And I love your tips for beautiful chalkboard writing. I used it the other day on my new command center and everyone that come over is amazed at how beautiful my lettering is 🙂 It’s my little secret that I didnt do it all by hand! Pinned.
Jenny, I love this! It’s so unique & such a nice twist on a traditional wreath. Thanks for linking up with Merry Monday!
This is such a fun idea! Turned out beautiful!
This is such a cute idea. I love it! I hope we see you link up with us at Family Joy Blog Link Up Party this week. Don’t forget to subscribe to the party newsletter so you never miss a party! http://thinking-outside-the-pot.com/?p=3038
love it and great to meet you on craft schooling Sunday!
Love this idea and your technique for chalk writing! Excellent little tidbit, but makes a huge difference-thank you!
I am so glad you joined us at Family Joy Blog Link Up Party!
I love wreaths that aren’t exactly wreaths and yours is very charming. Thank you for sharing at Snickerdoodle.
Very cute! I love the idea of using an old platter and writing with the chalk paint! Thanks for sharing!
God bless,
Patty
This is such a fun and whimsical wreath idea! I love fall and all fall decor!
Thanks for sharing (and for linking up to the #SHINEbloghop).
Wishing you a lovely week.
xoxo
You bet, thanks for stopping by!
I love chalkboard silverplate trays! So cute!
Thanks Amber!