
Perfectly Transfer Letters and Images – The Easy Way
I recently finished up a few projects, and one of them involved painting the days of the week on a menu board. I once tried hand lettering words to paint on a sign, and let’s just say it was a disaster and I will never try it again. Although I have fairly neat handwriting (I think it sometimes comes with the trade of teaching) when I try to write large and make my letters look the way I envision them in my mind, it’s a disaster. I quickly learned how to transfer words and graphics that I’ve printed onto items, making it easy to paint the perfect letters.
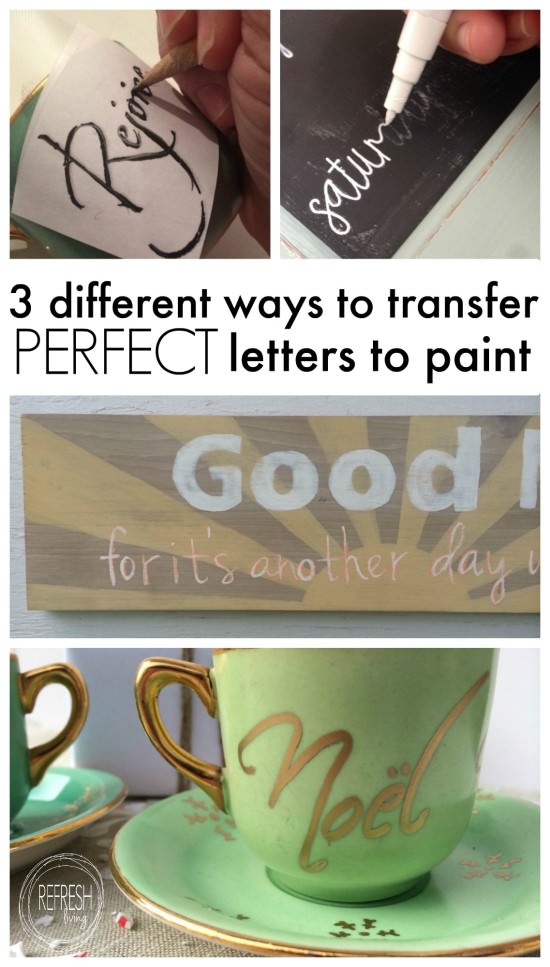
I’ve mentioned these various methods throughout many of my posts, but I thought it would make sense to devote an entire post to describe the three main ways that help me to create “perfectly” lettered signs and projects.
Chalk Method (use on darker colored backgrounds)

- Print your words or images, and then rub chalk over the back of the image.
- Place the image on the surface and trace over the letters with a ball point pen.
- The chalk in the places where you pressed the pen is left behind on the surface.
- Paint in the letters – they’ll look perfect!
Pencil Method (use on white or light colored backgrounds)
- Print your words or images, and then rub pencil over the back of the image.
- Place the image on the surface and trace over the letters with a ball point pen.
- The pencil is left behind on the surfaces in the places you pressed with the pen.
- Paint in the letters- they’ll look perfect!
Reverse Image Transfer
- Print your image/words in reverse (mirror image) using an inkjet printer. (A laser printer will not work for this method.)
- Lay the image to be transferred ink-side down onto the surface. Then, rub a pencil over the words.
- The printer ink will transfer to the surface in the places you rubbed the pencil.
- Paint in the letters – they’ll look perfect!
I use all of these methods, depending on the project, but my favorite is the chalk method. If my background surface is any color except white, I always grab my chalk. I recently tried to use colored chalk on a white surface, and it transferred well and it was dark enough to see to paint.
Once you give this image transfer business a try, you’ll find lots of ways to use it. Here are just a few of the projects I’ve used one of these methods on.
Post by Jenny Leads
Jenny is the voice behind Refresh Living. She has a passion for helping people to create a home they love without spending a lot of money.
I’ve done the #2 pencil trick , but never considered the chalk for darker back grounds, or the inkjet in reverse. Thank you, these are handy and easy to do. Pinned!
Thanks, Amy! Chalk is still my favorite – I find it transfers the best. And I just use colored chalk on white surfaces, so it’s pretty much my go-to no matter what!
I am always doing some kind of project where I have to transfer a letter or design. Thanks for the tips. Pinned.
Thanks so much for sharing! I’m glad it was helpful!
Thanks so much for sharing your ideas and tutorial with Talk of the Town.
You bet! It’s one of my favorite link parties.
Love these! Pinning to share. We appreciate you stopping by and linking up with us for Brag About It!
Thanks so much for sharing, Laurie!
Jenny, these ideas are fantastic and so helpful! I had no idea you could use these methods to transfer letters to paint. I can’t wait to tryc them out!